Monday, October 14, 2013

Laundry Day

Ok, ok, I know.  I fall off the face of the Earth and all of my adoring readers are out there wondering if I've stopped blogging or if I'm dead or if I've moved to a foreign country, and then I come back with a telephone table out of the blue with no explanation. Well I'm sorry. The truth of the matter is that I have 4 jobs and I'm going to grad school and am busier than a one armed paper hanger.

Plus I went to Disney World with my bestie. So I didn't have a lot of time for handying this summer.


Now that I'm back and hunkering down for the winter, the handying can commence once more. My next project came to be due to two little changes. Change number 1 is the weather. Part of hunkering down for the winter involved getting out my sweaters. I have hypothyroidism, and as a result, tend to be cold unless it's 80 degrees outside. Good thing I live in Texas right? So after the first cold snap of the season I can be seen sporting various sweaters and cardigans. Which really shouldn't be put in the dryer. My previous solution was to hang my sweaters on my dining room chairs. Which brings me to my next small change.  I have acquired a room mate. 

Isn't she the cutest thing?
So my previously private space of the dining room became a shared space. Plus, I always hate hauling my laundry through the house. So I decided to make a clothes rack. Insert inspiration photo from pintrest here.
Source:http://i.imgur.com/UGKf6.jpg
If anyone knows the original source, let me know.

Ok, so we start with a trip to (you guessed it) Bart's Barn. Here we find some scrap 1x2 for he frame. Then we head to the big box hardware store for some dowels and hardware. Then we're off to dad's scrap pile where we find the faux paneling plywood for the backing. Everything gets cut to the appropriate dimensions and corners are mitered. I use my dad's drill press to drill holes about halfway through the frame.

Yay power tools!

Next, paint. I went with gray for the front, and purple for the back.  I had a can of purple paint in mind, and I got home and remembered I'd used the last of it painting something else. So I pulled out what I did have. And I was trying to choose between red and blue. At this point I smacked myself in the head, mixed the two and carried on with purple.


 Painting dowels is... challenging to say the least. So what I did was go ahead and glue the dowels in on one side only. They were all a fairly tight fit, so it wasn't difficult to get them to stand upright. Then I clamped the side of the rack to my picnic table bench, and went to town with my gray paint. 

And I can't think of anything informative or witty for this caption.
I used my corner clamps and some finishing nails to complete the frame around the dowels, adding glue in all of the holes for the dowels.

If it looks like a ladder, you're doing it right.

Then I added all the hardware. I used the magnetic latches for cabinets to keep it up when not in use. The rest is just d-rings, chain, and hinges.

Composite shot!

To hang it on the wall, I put up a cleat first, nice and level, to bear the weight of the thing, and so I wouldn't have to level the actual rack and hold it there while I drilled. I marked the studs in the wall, so I didn't have to mess with molly bolts, and got my roommate to hold it up while I just drilled four holes straight through to studs and screwed it in. Finished product shot!


Added bonus - it covers a hole in my drywall!

So now it hangs right next to my dryer, and I don't have to traipse through the house with wet clothes anymore! Huzzah!


Friday, October 11, 2013

Before and After - telephone table

Once upon a time, a magical device found it's way into each and every home in America. It allowed one to speak to people that were far away. It was large, clunky, and had to be plugged into the wall. It looked a little something like this.
That's called a rotary dial. You had to move it to make the numbers go.  Barbaric no?

And in the 50's, the golden age of expendable income and middle class families, people began to make whole pieces of furniture, just to put these devices on. They were called telephone tables. Some had a bench attached so that you could sit and gossip all day long about what the neighbors did this weekend. Some had drawers so that you could store things like a pen and paper for taking messages, (yes, there was a time before voicemail. Before the answering machine even. I've read about it in books.) phone books, (this was pre-google as well) important phone numbers, (before your phone remembered them for you) and the random odd or end. I found one such table in my grandmother's garage. It was very very sad, and it called to me to make it pretty again. 
Save me from the garage!

So, I cleaned it, and attempted to sand it down to the bare wood. I don't know if it was just shellacked to death or if 50 years of grease and grime got the better of me, but I ended up cleaning it, giving it a light sanding, and painting most of it simply because I couldn't get down to the bare wood. Either way, it looks pretty now, and is a handy place to store extra iPhone chargers, headphones, and the odd dog toy.

I shall never be obsolete!


Saturday, June 1, 2013

AC vent covers


They're ugly.  They're filthy. They're difficult to clean.  And they're in almost everyone's house. These particular ones were in my mom's house. She's always hated them. So when I was a-pinteresting and I found this lovely picture below, I decided to do something about these.
Source

I think she cleaned hers before taking a picture.  I didn't. This is probably the first post I've ever done that didn't involve a single trip to Bart's Barn. I went to my local big box hardware store and found some decorative moulding, and some pretty sheet metal, and then I was off to a miter saw. 

This one's mine.  I inherited it.  

I always wear safety glasses and usually gloves when I operate a saw, because they are scary.  Not scared of a metal blade that could easily remove your fingers flying around at more than 100 miles per hour?  Then you're an idiot. Respect the flying blade of death, and it will do wonderful things to you.  Don't respect it, and it could do horrific things to you. Whilst I was cutting my moulding (yes I said whilst. Don't judge.) the blade snagged on an imperfection in the wood or something, and the wood sort of... exploded beneath my hand. I was too shaken up to take a picture, but splinters went flying all over my patio. I was wearing my gloves and eye protection, so I was fine, and I never operate my saw without someone nearby to call 911 if necessary, but I was pretty shaken.  I could feel the impact  in my hand half an hour later, not unlike when you get electrocuted, and you continue to buzz for a bit. (How do I know what getting electrocuted feels like?  That's another story.) So kiddies, always wear your safety gear, and respect the flying blade of death.

Long story short (too late) I cut my moulding to length and mitered the corners like a picture frame.

 
Now, I guinea pigged this project on my mom, and didn't get many pictures of her vents during the process.  For hers I used a bit of moulding with a simple bullnose on one side.  Mine were made from the lovely decorative moulding you see here. When you're mitering corners with moulding, it's important to make sure all the cuts are made with the decoration in mind.  Remember which edge is on the inside of the frame, and which is outside. If you need to, get a speed square and mark the cuts you're going to make before you make them.  And buy a little more wood than you need in case some of it explodes or you make the wrong cut. 

Next I glued the corners, and used my handy dandy corner clamps to keep them in place whilst (yes I did it again) the glue cured. 

I'm sure you could use some elaborate rig to replace the corner clamps, but they do make it easier. 

Then I cut the pretty metal into the right size with my tin snips.  Which have disappeared in the shuffle of the tools in the garage. I'm sure they're in the same dimension as my mom's lost keys. 

And painted my frames white.  I stained my mom's because she has this thing for stained wood. After pictures to come!


Now we attach the metal to the frame.  There are several ways to do this. At my mother's suggestion, we duct taped her metal to her frames. After all, we were about to screw it into the wall, and that would hold up the metal nicely.  If I was going to go with tape again, I would use double sided tape instead.  We didn't get good stickage with the duct tape, mainly because there wasn't enough wood to get a grip on. But as she predicted, when we screwed it to the wall it held just fine.  For mine, however, I went with tiny screws.  I think they're 1/4 inch screws. I put one screw in each corner of the metal. That gave me a nice firm grip I knew wasn't going anywhere. 

Mom wanted hers to be removable, so I screwed them into the wall by drilling two holes through the frame, and then just using the screws from the previous returns. 


Mine, well I figure I've lived here five and a half years without ever needing to take the returns off except when I painted.  I already painted. I'm not doing it again any time soon. So I finish nailed those suckers into place. 

Tada!

Now.  That metal is not cheap. In fact it's rather on the pricey side.  But I LOVE the way this little detail makes my home look just a little bit classier. Like a nice necklace turns a pair of slacks and a blouse into an outfit. My ex boyfriend thought they were a waste of time and money.  One of many reasons he's my ex boyfriend.  What do you think?


Friday, May 24, 2013

Garage Overhaul - Phase 1

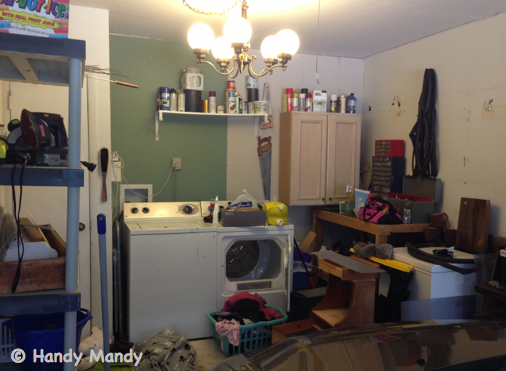
I have a one car garage.  I have one car.  Oddly enough, I insist on my car being able to fit in my garage.  Call me crazy, but I've got this insane idea that that's what garages are for. But a girl has to have a place to be handy too, so my little garage does double duty. Here's a pic of what it looked like this morning.

I am so ashamed right now.

I can't even begin to describe what a mess this place was just a few short hours ago. Valuable work bench real estate is rendered inaccessible because it's under the cabinet on the wall. Stuff is EVERYWHERE. I can't get to the stuff in the corner. And this is definitely not a safe place for my unmentionables. 

So I devised a plan. A serious rearranging.  I wanted to make a counter that would sit between my washer and dryer. And I was off to Bart's Barn.  I bought a couple of pine shelves that had been painted, and obviously had a hard life.  One of them had a very clear iron burn on it. I also bought a piece of scrap two by three - I think.  I spent less than $5 on all this plus some very pretty trim that you will see in a future post.  Seriously this entire build cost less than ten bucks.  Go me. Step one, cut two by three into short lengths. 
The short piece is scrap. I'll find a home for it later. 

At this point I backed car out of garage, and moved everything. Appliances and workbenches and cabinetry got new homes.  Let me tell you, that cabinet is HEAVY. When I was done, I was drenched in sweat.  In a wring out your shirt kind of way.  Not very lady-like. So I decided to rest, eat, and sit in the AC for a while. Before I could construct my new counter, I had to measure the space between the washer and dryer now that I'd got them in position, and cut shelves to length. Then I laid out the counter in a dry fit. 


And marked the holes for the L brackets, and drilled them in place.


Nest, I applied lots of glue and screwed the cleat to the shelves, with L brackets attached. I thought I was done.  I plopped the counter between the washer and dryer, and realized that the metal brackets on the metal washer and dryer were going to rub against each other as my washer and dryer wriggled and vibrated  in spin cycles and what not. So, I applied some newly rediscovered weather stripping to the underside of the brackets as cushioning.  (I found so much stuff I forgot I had today.) Perfect fit!

Then I slid the counter back in place. 

The next few hours were spend sweeping, throwing away stuff I didn't need, and replacing things in the cabinet. My garage feels so spacious now!

You can't see it, but under the counter is a nifty place for a trash can and my step stool. I also have a space heater in there for the cold months.  

I'm disproportionally happy about the extension cord I mounted on the wall.  Power!

Ok, so it's not exactly pretty. I'm working on it ok?  It's functional!  Might I remind you what it looked like this morning?


And the most important detail of all, my car still fits!


Re-reading this post makes this seem like a quick and easy project. It was not.  It took all day, I'm dirtier than I've been in months, and my feet feel like they're going to fall off.  But it was totally worth it. I'm going to go shower now. 


Sunday, May 12, 2013

Mothers' Day

This post does not have any how to's.  It doesn't have fancy pictures.  It is about my mother, whom I love.

My mother taught me how to learn.  She taught me to question, to explore, to look it up.  She taught me to be creative, and to take risks (although I bet she wishes she hadn't.) She taught me that other people have reasons for the things they do.  She taught me empathy, and kindness.  She tried to teach me to sew, and wear pink, and do my hair, and be girly.  But those were things I guess I had to figure out myself.

When she was 18 years old, my mom left home to be married to my father, who was in the Navy.  She moved across the country and lived in Virginia and Maine. She knew no one there but my father.  I would have been terrified. She did this with no computers, no skype, no cell phone, no google maps. Long distance phone calls were so expensive, she couldn't even afford to call her mom for advice when things went wrong. She relied on her own gumption and the kindness of strangers. My mother is courageous.

When she came back to Texas, she completed a bachelors degree, even though no one expected her to need one. She rode a bus for an hour each way to get to class. She struggled through wanting a child, and being unable to have one, while her friends were busy becoming mothers. She became pregnant, and still she rode that bus, an hour each way, to and from school. My mother is tenacious.

When I was very very little, my mother started a program to video tape the sermons at her church and broadcast them on the local cable channel.  In the 1980's. When no one else was doing this yet. She picked up cameras, hauled them to church, set them up, edited the tape, and returned them to the cable station, with help from a few friends. Eventually someone else took over the project, and everyone seemed to forget that it was my mom that started it all.  Now every church has a program like this. My mother is innovative.

When I was 4 my mother began working at my pre-school.  She worked their for 19 years, teaching 4 year olds.  My mother is patient.

She developed curriculum from nothing, and worked with very little resources to come up with art projects and lesson plans for these 4 year olds.  My mother is creative.

When I went to elementary school, my mother began a computer lab at my old pre-school, to teach 3, 4, and 5 year olds computer skills like how to use a mouse, and how to type.  It helped them recognize letters and numbers, and helped with their fine motor skills.  Her learning objectives were nearly identical to the technology TEKS that were developed by the state of Texas, about 5 years later. My mother is ingenious.

Three weeks ago, I called my mom to inform her that I was having an appraisal done and I needed to work on my curb appeal.  I called her on a Saturday at 2 pm.  By 4 pm she was at my house - an hour from hers - with a tray of pansies and a can do attitude.  I didn't even have to ask.  We worked until about 9 that night.  She was back the next afternoon with an edger and my father to help. The next weekend, she was here with a tree and a shovel. She gave up two weekends to help me make my house look pretty. My mother is kind.

My mother is all these things and more.  She will deny it, but she is beautiful. And I am proud of her.

Happy Mothers' Day mom.

Saturday, May 11, 2013

Operation Yard Overhaul

As of May 28th, I will have been living in my house for exactly five years and six months.  Five years ago, when I was but a wee lass, interest rates were hovering around 6%.  I got a fantastic deal.  For the time. Now, interest rates are quite a bit lower, and my fantastic deal doesn't look so fantastic anymore. Hence, refinancing.

After a brief visit with my friendly neighborhood credit union representative, I was rolling right along with the process of a refinance. Part of the process involves an appraisal.  Meaning someone is going to come look at my house and tell me what it's worth. I shall be judged. So, I decided to put a little bit of money and a lot of effort into making my house look it's very best for the nice people from the bank.

Step one, mow.  And edge. And weed-eat. That part was relatively simple.

Grow little tree!

Step two, plant a tree, and some flowers.  The tree was a present from my mom, and was totally on sale for $7.50.  Way to score a deal mom! She also brought me some pansies.  I think they're the purple ones.  My thumb isn't green.  It's usually orange or red, or whatever color I'm painting with at the moment.


Step three, mulch everything. Step four, create seating area under the smurf-brella, as my bestie calls it. Remember?  It was my first post.

Take smurfbrella, add chairs and a stool. 
Become dissatisfied with paint scheme and improve. 

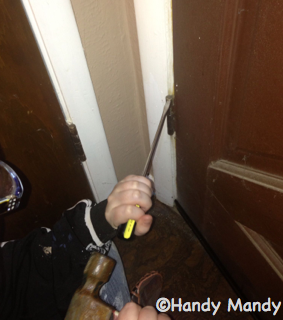
Step 5 paint front door. This sounds really simple.  It wasn't. First, I had to get the bloody thing off it's hinges. I did this with a flat head screwdriver, a hammer, and an extra set of hands.  I carefully tapped the pins out of the hinges.
Carefully. Working in a corner is hard, and my thumbs are delicate.

Then I got it on the sawhorses, took out dozens of screws, a set of blinds, and three locks,  and examined the damage. My front door sadly looks awful. You can tell it was probably pried open with a flat crowbar at some point in it's life.  Hence the decade old alarm permit that I peeled off with a razor blade and the three weird mismatched locks that give it a decidedly paranoid feel.


And then we sand.  I needed to get a good "tooth" so that the paint would stick, not sand down to the bare wood.
I heart my detail sander.

Next, we clean. We have to get every bit of dust off the door. This is definitely not the fun part.


Then we tape off anything we don't want painted, and paint.  I taped off the windows, and painted everything but the triangular sections a nice boring beige. Then I taped off the flat parts of the door, and painted the triangular sections a rust red that matches the exterior of my house.  Gives it a nice "pop."


Here's a how to for you, to help you tape off corners without those little tabs of tape ruining your edges. 


Then came the painstaking process of hanging the door back on it's hinges and re-attaching all the paranoid hardware. During which I was too busy cursing and pinching my fingers to take pictures.  Sorry.


And voila!  It almost looks as good as a new door!  Almost.


Step 6, throw a barbecue!


Tuesday, April 30, 2013

Thrift Shopping

Denton has about a dozen thrift shops in town, benefiting various charitable causes.


Twelve.  Count 'em.

 I tend to frequent these thrift shops as a matter of habit because a. I be poor, and b. things be cheap. And it just so happens that I was shopping for a new TV console.  I'm usually all about the new gadgets and gizmos, but I've yet to replace my sad 1990's TV.  Partly because it still works just fine, and why bother spending a fortune on a flat paneled doohickey when I've got something functional, but mostly because my TV stand was made to accommodate the old school square model TV, and not the newer rectangular version. HDTVs have an aspect ratio of 9:16, and since TVs are measured on the diagonal, some complicated math that you care nothing about tells me that I can't have a TV bigger than 22 inches.  Some more complicated math tells me that this would actually give me less screen space, and though the diagonal measurement is actually bigger, the area of the screen is smaller than my current TV.  All this to say, if I want a new TV, I need a new TV stand. So I went a pinteresting. Here's what I found.
Source:Darling Doodles Design

I wanted to go with something fairly similar to this, with an open table top and storage underneath. Hence, thrift shopping. In my third shop, which supports a local women's shelter, I found this lovely low dresser with two drawers. It was literally falling apart.
It really doesn't look like much, does it?

The shop manager told me that I could have it for any donation.  Naturally, I asked "So you mean, I could give you fifty cents, and you'd let me haul it off?"  I got a hesitant affirmative, and ended up giving the man what I had floating around my purse in ones.  $7. After it fell to pieces in my car, I began reconsidering the wisdom of my purchase.

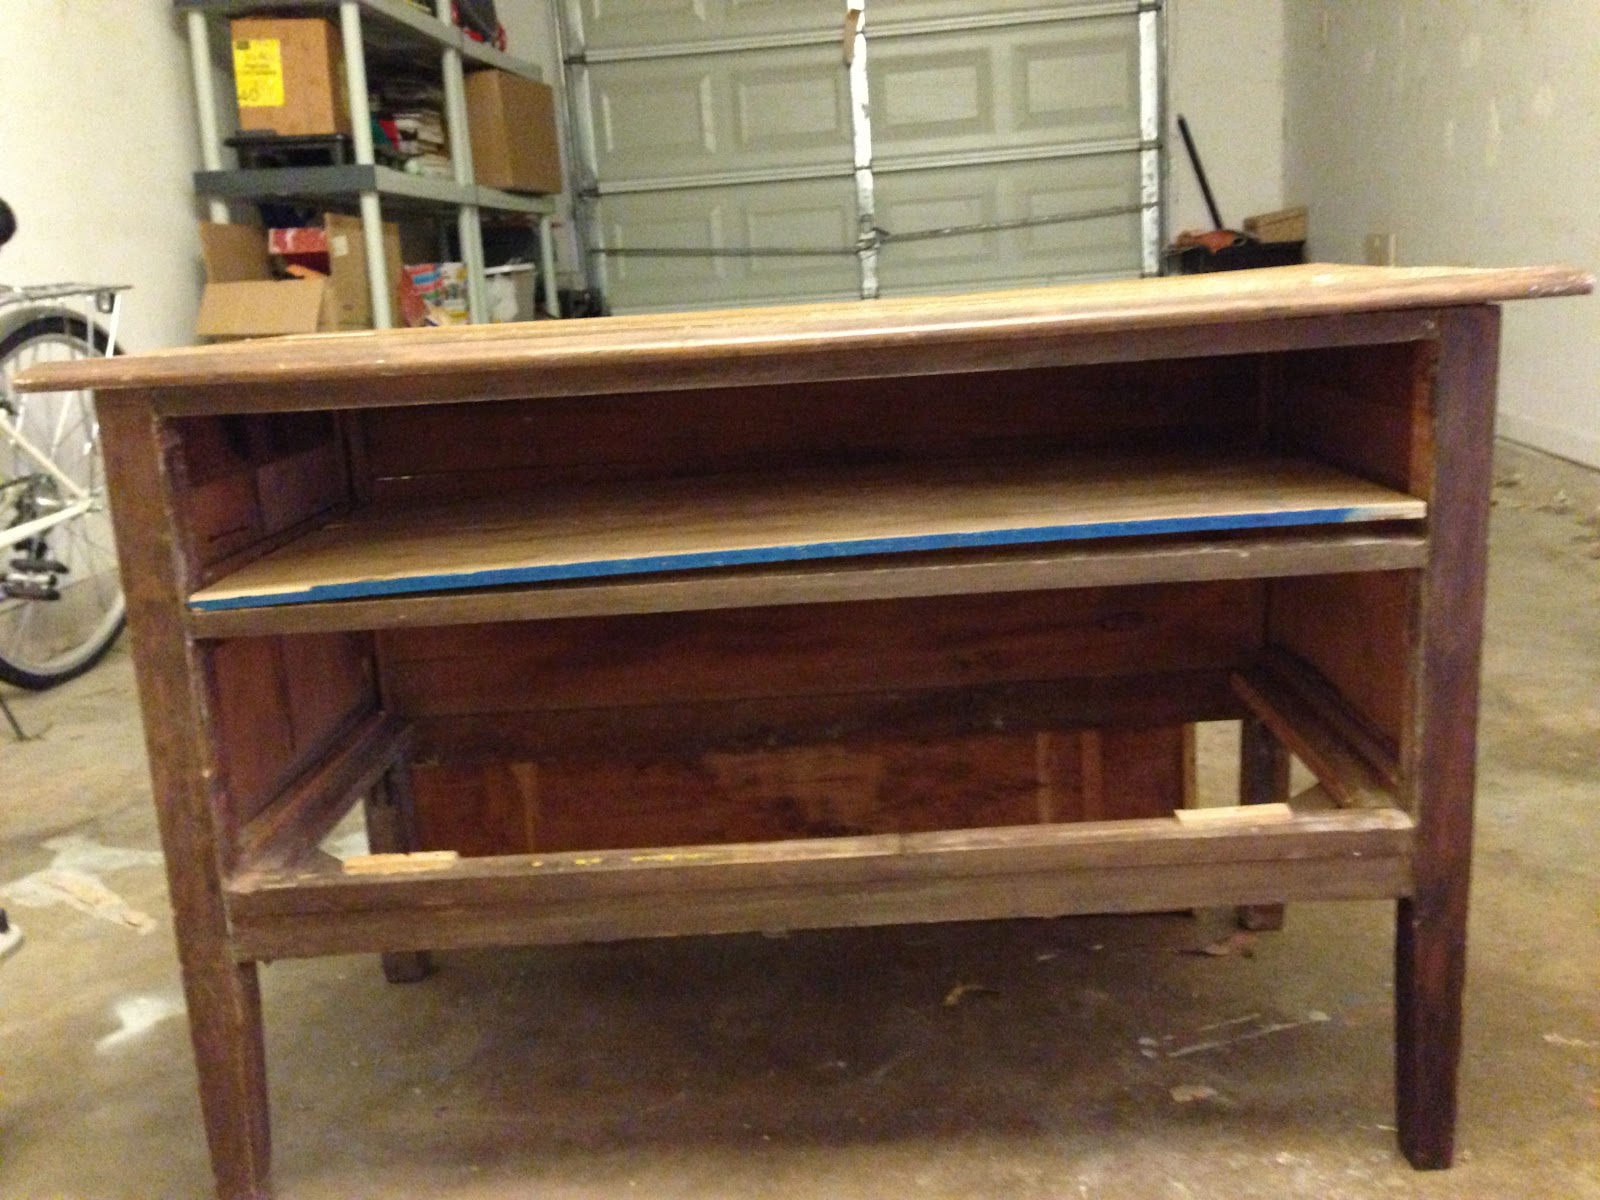
I painstakingly pulled the dresser apart, bit by bit, glued, clamped and finish-nailed it back to something near it's original sturdiness.  I cut a piece of plywood for the shelf and did a dry fit.

Then I got to sand it down with my brand new Ryobi sander.  I like Ryobi tools because they're generally light weight and easy to handle, and I have small girly hands, even when they're covered in paint and sawdust. And no, Ryobi didn't pay me to say so.
Anyone notice how much I use blue?

Then, I commenced to taping over the stiles and the drawer front.  The stiles are solid wood, and the drawer front is veneer. But it's pretty veneer, and in good shape, so I decided to keep it. Everything else got a couple of coats of blue, inside and out.  This included the plywood that was to become the shelf, and the table top.  I wanted to stain the table top, but it had been horribly repaired by someone not quite as handy as me at one point, and really was beyond repair. Next came staining what was left a dark color to match the drawer front. Original drawer pulls got a nice red coat of paint. I didn't prime the drawer pulls first, and only used one coat of paint, which gave the effect of almost a red glaze. You can see the wood grain through the paint, which I particularly like.  Next I had to drill a large hole in the back of the dresser for the cords to come through.  I put everything back together, glueing the shelf in place, and polyurethaned the whole shebang. Ta-da! Finished product.


And actually, I found a dresser that fits the space even better at my grandmother's house, which is getting the TV console treatment soon, so this beauty is available for sale at my etsy store.