Showing posts with label butcher block. Show all posts

Wednesday, May 7, 2014

Kitchen Reno Part Deux

See? I haven't forgotten you! I promised you a photo of my new hard hat, and here it is!


This is my first ever selfie!

Ok, so no, I haven't been without a kitchen sink for months. But my kitchen was far from finished. Now it's finished, and you can see it.

So. First thing I did was cut my butcher block to length, and cut a big ol' hole in it for the sink. I tried free handing this by dropping in a circular saw. That was a mistake. 

I ended up cleaning up the edges by using a fence to guide the edge of my circular saw. My undercounted sink is held in place with some clips and some heavy duty wood screws (since my countertop is wood.) 

I don't have any pictures of this part because... let's just say that emotions were running high that day. 

Next I needed to drill a hole through the counter for the sink. Which I did. Now my faucet was purchased online for a grand total of $38 bucks. Comparable models were about $200. It came from overseas and all the directions were in Chinese. So that was exciting. It's a good thing I'm handy. When we initially attached the faucet, we found that the countertop was so thick, that there wasn't room for the hardware to attach properly.
Does not fit.
Notice how the nut in the front is not fully on the bolt. So the solution was to carve out some space for that little metal flange thingy to sit below the bottom surface of the counter. I drew a circle around the flange and used a forester bit to carve out the surface about an inch down. This would not show from the top side. 

I smoothed the edges with my chisel, another Christmas present. Then we reassembled. And it fit!
Trust me, it's supposed to look like that. 
Now we flip the counter over, tighten everything up, and check for leaks! And we take it off again, and find the nut that the Chinese directions clearly pointed out that we should tighten, that we completely missed, flip it back over, tighten everything up, and check for leaks again! And it works! So I screwed the countertop down from below.

Yay for running water!
Then we cut the rest of the butcher block for the other counters and the window sill. I spread lots and lots of mineral oil onto the wood, and let it soak in, for a beautiful shiny, protected countertop.


Miles of counter space!
Then I attached the backsplash. This was literally as easy as using tin snips to cut the plastic to size, and sticking it to the wall with adhesive. It looks like pressed tin, but it's really just plastic.


After that, it's just a few paint touch ups, a little trim, a few quirky touches, and BOOM! Hello dream kitchen.
This is the same trim as on the cabinet - to cover an ugly place where the wall meets the backsplash.

What's a dream kitchen without an appropriately disturbing knife block?


Total costs ran me about $1200. Not bad. Not bad at all.


Sunday, January 20, 2013

Kitchen Cart Intensive Care


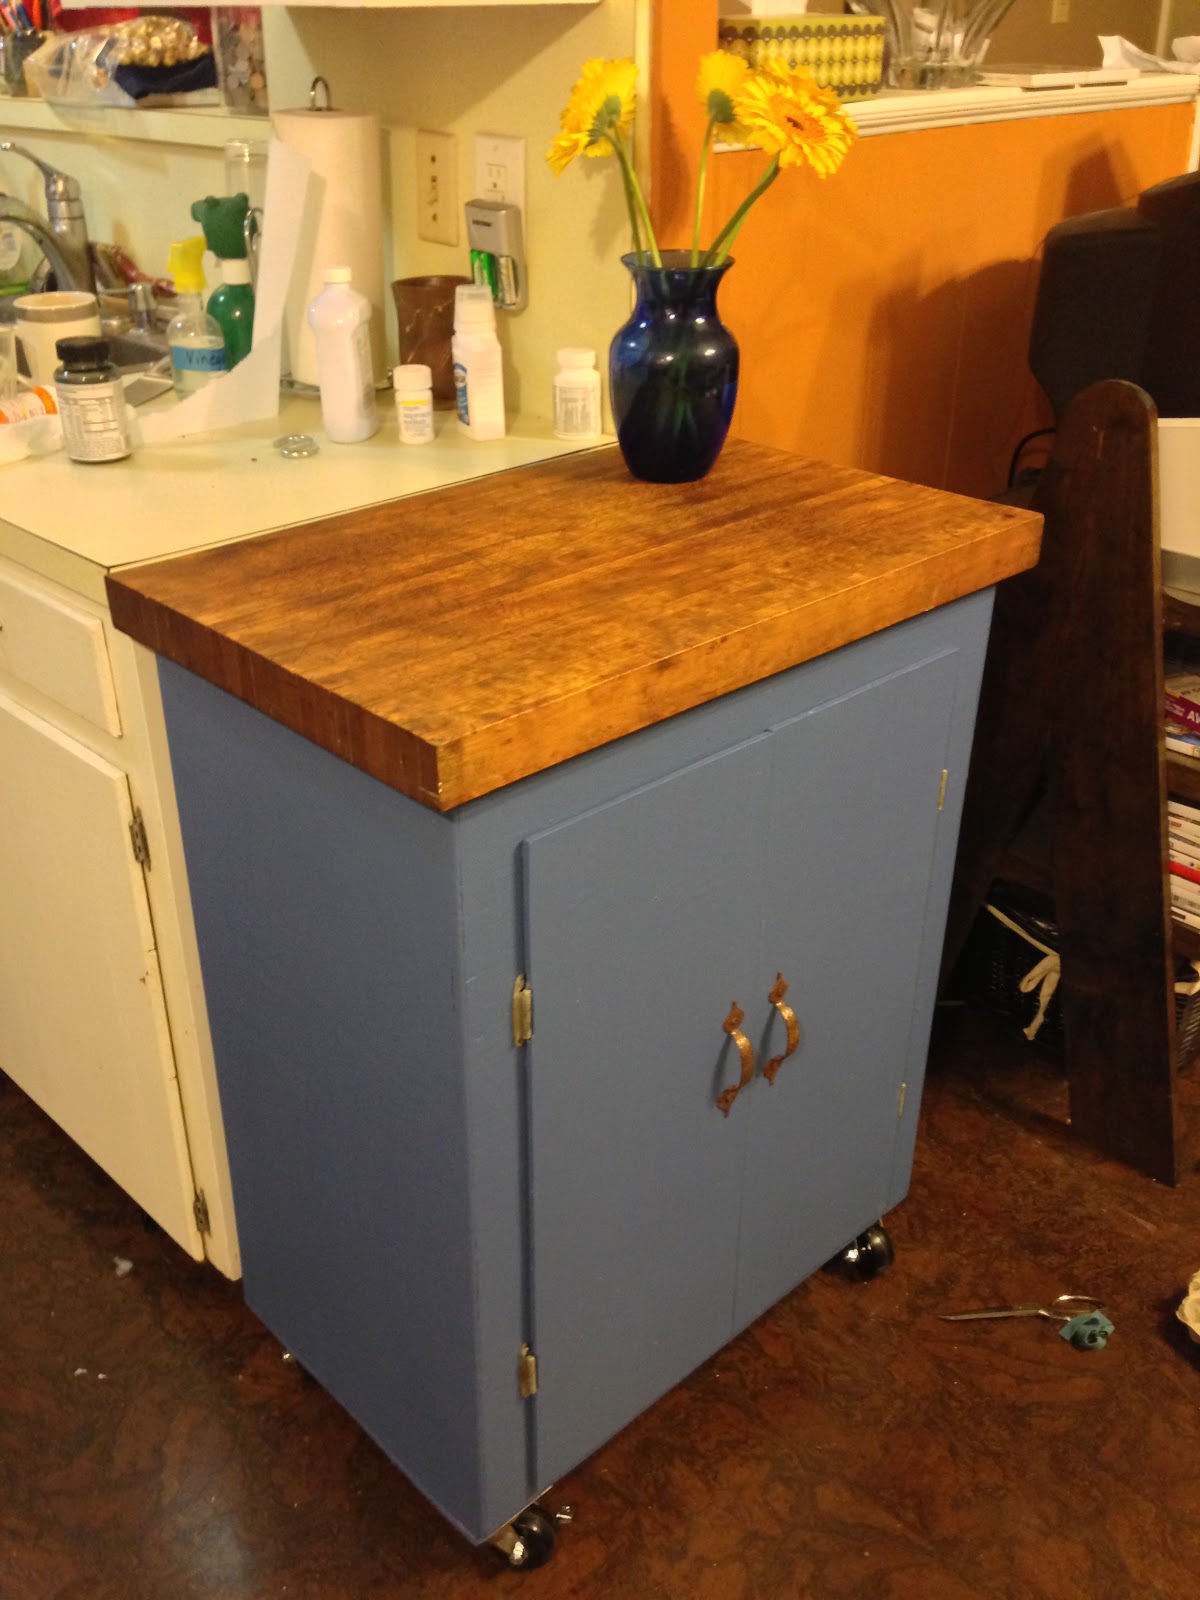
This post, like so many others, starts with Bart's Barn, and me having a postage stamp sized house. My house has 14.2 square feet of counter space built into it.  For someone who is actually handier in the kitchen than in the tool shed, this is not sufficient. So I have supplemented over the years with cutting boards spanning the sink, microwave carts with no microwave, and eventually a beautiful 1920's era sideboard. All of which are currently cluttered with mail, boxes of microwave popcorn, kitchen aid mixers, bottles of wine, knife blocks, and various trappings of cookery. I yearn for great expanses of counter space for chopping and baking and what not. So when I was mining Bart's Barn for drawers to turn into shadow boxes and I happened upon an old sad kitchen cart, well I just had to have it (no matter that there was no way it was going to fit in my car.) I wrestled it home and got the hardware off.


It cost me $40. First order of business was that butcher block top.  I sanded it down to get out the worst of the knife scars, and applied liberal amounts mineral oil. (This can be found at your local drugstore near the laxatives. Don't ask me why.) After a ten minute wait and a brief wipe down, it sprung back to life in a way I had scarcely hoped for. 
Look at it shine!


Now this kitchen cart baffled me.  It was very sound construction, but the materials were pretty crappy stuff. 3/4 inch plywood and particle board made up most of the structure.  The handles for the doors were a nice copper, but you could hardly notice against the rough surface of raw plywood. Some of the cut ends of the plywood hadn't even been sanded. So, I decided to paint the whole thing. I started by sanding everything that hadn't been sanded.  I mixed some of my blue paint leftover from the pot lid holder with some darker blue to get a denim color. Since I had mixed the paint, I didn't want to run out halfway through the project, as I'd never match the color. Normal people would turn to primer for this much raw wood.  I didn't have any primer.  What I did have was a hideous gallon of oops paint my mom had bought.  It was roughly the shade of my skin, and she swears it looked good in the store.  So I slapped a coat of that on everything to soak into all the raw wood and spare me 3-5 coats of blue paint.


I promise I'm not going to leave it this color.


Then everything got a coat of blue. When it was time to put the hardware back on, I decided those copper handles were filthy and needed a cleaning... with science!  When you were a kid did you ever clean a penny with vinegar and baking soda?  No?  Ok, you need to go watch some Bill Nye. Pennies are made of copper so I figured it would work just as well on my copper handles.


For Science!


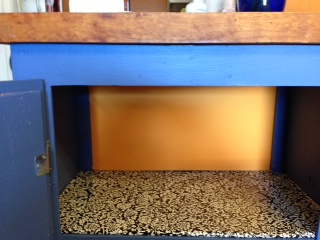
While I was at it, I chopped off the feet of the cabinet, and added a piece of plywood to the base, to screw some industrial type castors onto. The castors that came with the piece were the kind you pop into some kind of hole drilled into the feet of your piece.  Basically what this means is any time you lift your cart, your castors come out and roll away.  No bueno.  My new castors are screwed in tight and aren't going anywhere, plus two of them lock for keeping my cart in place when needs be. I didn't take pictures of the process, but it's really pretty self explanatory. Next I turned my attention to the interior. The shelves got shelf paper.  BTW, contact paper doesn't stick too well to particle board.  If anyone has any tips on making it stay better, let me know. I put it in place and weighed it down with books overnight. That helped some.  

The next little tidbit comes from Pretty Handy Girl. I wanted to not see the support braces in the back of my cabinet, so I made false backs out of fabric and foam board.  This is cool for the backs of open cabinets.  Step one, measure your cabinet backs carefully. 


Step 2, cut a sheet of foam board to fit the space.  I used an exacto knife on my handy butcher block cutting board. 


Step 3, cut your fabric 2-3 inches bigger than your foam board.  I picked this orangey yellow solid, since my shelf paper is a kind of busy print. 

Step 4, use packing tape to stretch the fabric tight and sort of "upholster" the foam board. 


Step 5, push the foam board carefully into the space you measured it for.  Ta-da!


And now for the big reveal!  Somehow, magically, my cart came out to be EXACTLY counter height. So cool!


My total cost was just under $100. For a little perspective this similarly sized butcher block cart with open shelves is more than three times that.