This post does not have any how to's. It doesn't have fancy pictures. It is about my mother, whom I love.
My mother taught me how to learn. She taught me to question, to explore, to look it up. She taught me to be creative, and to take risks (although I bet she wishes she hadn't.) She taught me that other people have reasons for the things they do. She taught me empathy, and kindness. She tried to teach me to sew, and wear pink, and do my hair, and be girly. But those were things I guess I had to figure out myself.
When she was 18 years old, my mom left home to be married to my father, who was in the Navy. She moved across the country and lived in Virginia and Maine. She knew no one there but my father. I would have been terrified. She did this with no computers, no skype, no cell phone, no google maps. Long distance phone calls were so expensive, she couldn't even afford to call her mom for advice when things went wrong. She relied on her own gumption and the kindness of strangers. My mother is courageous.
When she came back to Texas, she completed a bachelors degree, even though no one expected her to need one. She rode a bus for an hour each way to get to class. She struggled through wanting a child, and being unable to have one, while her friends were busy becoming mothers. She became pregnant, and still she rode that bus, an hour each way, to and from school. My mother is tenacious.
When I was very very little, my mother started a program to video tape the sermons at her church and broadcast them on the local cable channel. In the 1980's. When no one else was doing this yet. She picked up cameras, hauled them to church, set them up, edited the tape, and returned them to the cable station, with help from a few friends. Eventually someone else took over the project, and everyone seemed to forget that it was my mom that started it all. Now every church has a program like this. My mother is innovative.
When I was 4 my mother began working at my pre-school. She worked their for 19 years, teaching 4 year olds. My mother is patient.
She developed curriculum from nothing, and worked with very little resources to come up with art projects and lesson plans for these 4 year olds. My mother is creative.
When I went to elementary school, my mother began a computer lab at my old pre-school, to teach 3, 4, and 5 year olds computer skills like how to use a mouse, and how to type. It helped them recognize letters and numbers, and helped with their fine motor skills. Her learning objectives were nearly identical to the technology TEKS that were developed by the state of Texas, about 5 years later. My mother is ingenious.
Three weeks ago, I called my mom to inform her that I was having an appraisal done and I needed to work on my curb appeal. I called her on a Saturday at 2 pm. By 4 pm she was at my house - an hour from hers - with a tray of pansies and a can do attitude. I didn't even have to ask. We worked until about 9 that night. She was back the next afternoon with an edger and my father to help. The next weekend, she was here with a tree and a shovel. She gave up two weekends to help me make my house look pretty. My mother is kind.
My mother is all these things and more. She will deny it, but she is beautiful. And I am proud of her.
Happy Mothers' Day mom.
Sunday, May 12, 2013

Saturday, May 11, 2013
Operation Yard Overhaul
As of May 28th, I will have been living in my house for exactly five years and six months. Five years ago, when I was but a wee lass, interest rates were hovering around 6%. I got a fantastic deal. For the time. Now, interest rates are quite a bit lower, and my fantastic deal doesn't look so fantastic anymore. Hence, refinancing.
After a brief visit with my friendly neighborhood credit union representative, I was rolling right along with the process of a refinance. Part of the process involves an appraisal. Meaning someone is going to come look at my house and tell me what it's worth. I shall be judged. So, I decided to put a little bit of money and a lot of effort into making my house look it's very best for the nice people from the bank.
Step one, mow. And edge. And weed-eat. That part was relatively simple.
Step two, plant a tree, and some flowers. The tree was a present from my mom, and was totally on sale for $7.50. Way to score a deal mom! She also brought me some pansies. I think they're the purple ones. My thumb isn't green. It's usually orange or red, or whatever color I'm painting with at the moment.


Step three, mulch everything. Step four, create seating area under the smurf-brella, as my bestie calls it. Remember? It was my first post.
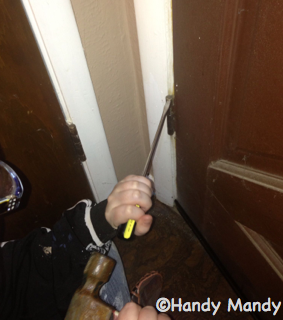
Step 5 paint front door. This sounds really simple. It wasn't. First, I had to get the bloody thing off it's hinges. I did this with a flat head screwdriver, a hammer, and an extra set of hands. I carefully tapped the pins out of the hinges.
Then I got it on the sawhorses, took out dozens of screws, a set of blinds, and three locks, and examined the damage. My front door sadly looks awful. You can tell it was probably pried open with a flat crowbar at some point in it's life. Hence the decade old alarm permit that I peeled off with a razor blade and the three weird mismatched locks that give it a decidedly paranoid feel.

And then we sand. I needed to get a good "tooth" so that the paint would stick, not sand down to the bare wood.
Next, we clean. We have to get every bit of dust off the door. This is definitely not the fun part.


And voila! It almost looks as good as a new door! Almost.
Step 6, throw a barbecue!

After a brief visit with my friendly neighborhood credit union representative, I was rolling right along with the process of a refinance. Part of the process involves an appraisal. Meaning someone is going to come look at my house and tell me what it's worth. I shall be judged. So, I decided to put a little bit of money and a lot of effort into making my house look it's very best for the nice people from the bank.
Step one, mow. And edge. And weed-eat. That part was relatively simple.
 |
| Grow little tree! |
Step two, plant a tree, and some flowers. The tree was a present from my mom, and was totally on sale for $7.50. Way to score a deal mom! She also brought me some pansies. I think they're the purple ones. My thumb isn't green. It's usually orange or red, or whatever color I'm painting with at the moment.


Step three, mulch everything. Step four, create seating area under the smurf-brella, as my bestie calls it. Remember? It was my first post.
 |
| Take smurfbrella, add chairs and a stool. |
 |
| Become dissatisfied with paint scheme and improve. |
 | |
|

 |
| I heart my detail sander. |
Next, we clean. We have to get every bit of dust off the door. This is definitely not the fun part.

Then we tape off anything we don't want painted, and paint. I taped off the windows, and painted everything but the triangular sections a nice boring beige. Then I taped off the flat parts of the door, and painted the triangular sections a rust red that matches the exterior of my house. Gives it a nice "pop."


Here's a how to for you, to help you tape off corners without those little tabs of tape ruining your edges.
Then came the painstaking process of hanging the door back on it's hinges and re-attaching all the paranoid hardware. During which I was too busy cursing and pinching my fingers to take pictures. Sorry.

Step 6, throw a barbecue!

Tuesday, April 30, 2013
Thrift Shopping
Denton has about a dozen thrift shops in town, benefiting various charitable causes.

I tend to frequent these thrift shops as a matter of habit because a. I be poor, and b. things be cheap. And it just so happens that I was shopping for a new TV console. I'm usually all about the new gadgets and gizmos, but I've yet to replace my sad 1990's TV. Partly because it still works just fine, and why bother spending a fortune on a flat paneled doohickey when I've got something functional, but mostly because my TV stand was made to accommodate the old school square model TV, and not the newer rectangular version. HDTVs have an aspect ratio of 9:16, and since TVs are measured on the diagonal, some complicated math that you care nothing about tells me that I can't have a TV bigger than 22 inches. Some more complicated math tells me that this would actually give me less screen space, and though the diagonal measurement is actually bigger, the area of the screen is smaller than my current TV. All this to say, if I want a new TV, I need a new TV stand. So I went a pinteresting. Here's what I found.
I wanted to go with something fairly similar to this, with an open table top and storage underneath. Hence, thrift shopping. In my third shop, which supports a local women's shelter, I found this lovely low dresser with two drawers. It was literally falling apart.
The shop manager told me that I could have it for any donation. Naturally, I asked "So you mean, I could give you fifty cents, and you'd let me haul it off?" I got a hesitant affirmative, and ended up giving the man what I had floating around my purse in ones. $7. After it fell to pieces in my car, I began reconsidering the wisdom of my purchase.
I painstakingly pulled the dresser apart, bit by bit, glued, clamped and finish-nailed it back to something near it's original sturdiness. I cut a piece of plywood for the shelf and did a dry fit.

Then I got to sand it down with my brand new Ryobi sander. I like Ryobi tools because they're generally light weight and easy to handle, and I have small girly hands, even when they're covered in paint and sawdust. And no, Ryobi didn't pay me to say so.
Then, I commenced to taping over the stiles and the drawer front. The stiles are solid wood, and the drawer front is veneer. But it's pretty veneer, and in good shape, so I decided to keep it. Everything else got a couple of coats of blue, inside and out. This included the plywood that was to become the shelf, and the table top. I wanted to stain the table top, but it had been horribly repaired by someone not quite as handy as me at one point, and really was beyond repair. Next came staining what was left a dark color to match the drawer front. Original drawer pulls got a nice red coat of paint. I didn't prime the drawer pulls first, and only used one coat of paint, which gave the effect of almost a red glaze. You can see the wood grain through the paint, which I particularly like. Next I had to drill a large hole in the back of the dresser for the cords to come through. I put everything back together, glueing the shelf in place, and polyurethaned the whole shebang. Ta-da! Finished product.


And actually, I found a dresser that fits the space even better at my grandmother's house, which is getting the TV console treatment soon, so this beauty is available for sale at my etsy store.

 |
| Twelve. Count 'em. |
I tend to frequent these thrift shops as a matter of habit because a. I be poor, and b. things be cheap. And it just so happens that I was shopping for a new TV console. I'm usually all about the new gadgets and gizmos, but I've yet to replace my sad 1990's TV. Partly because it still works just fine, and why bother spending a fortune on a flat paneled doohickey when I've got something functional, but mostly because my TV stand was made to accommodate the old school square model TV, and not the newer rectangular version. HDTVs have an aspect ratio of 9:16, and since TVs are measured on the diagonal, some complicated math that you care nothing about tells me that I can't have a TV bigger than 22 inches. Some more complicated math tells me that this would actually give me less screen space, and though the diagonal measurement is actually bigger, the area of the screen is smaller than my current TV. All this to say, if I want a new TV, I need a new TV stand. So I went a pinteresting. Here's what I found.
 |
| Source:Darling Doodles Design |
I wanted to go with something fairly similar to this, with an open table top and storage underneath. Hence, thrift shopping. In my third shop, which supports a local women's shelter, I found this lovely low dresser with two drawers. It was literally falling apart.
 |
| It really doesn't look like much, does it? |
The shop manager told me that I could have it for any donation. Naturally, I asked "So you mean, I could give you fifty cents, and you'd let me haul it off?" I got a hesitant affirmative, and ended up giving the man what I had floating around my purse in ones. $7. After it fell to pieces in my car, I began reconsidering the wisdom of my purchase.
I painstakingly pulled the dresser apart, bit by bit, glued, clamped and finish-nailed it back to something near it's original sturdiness. I cut a piece of plywood for the shelf and did a dry fit.
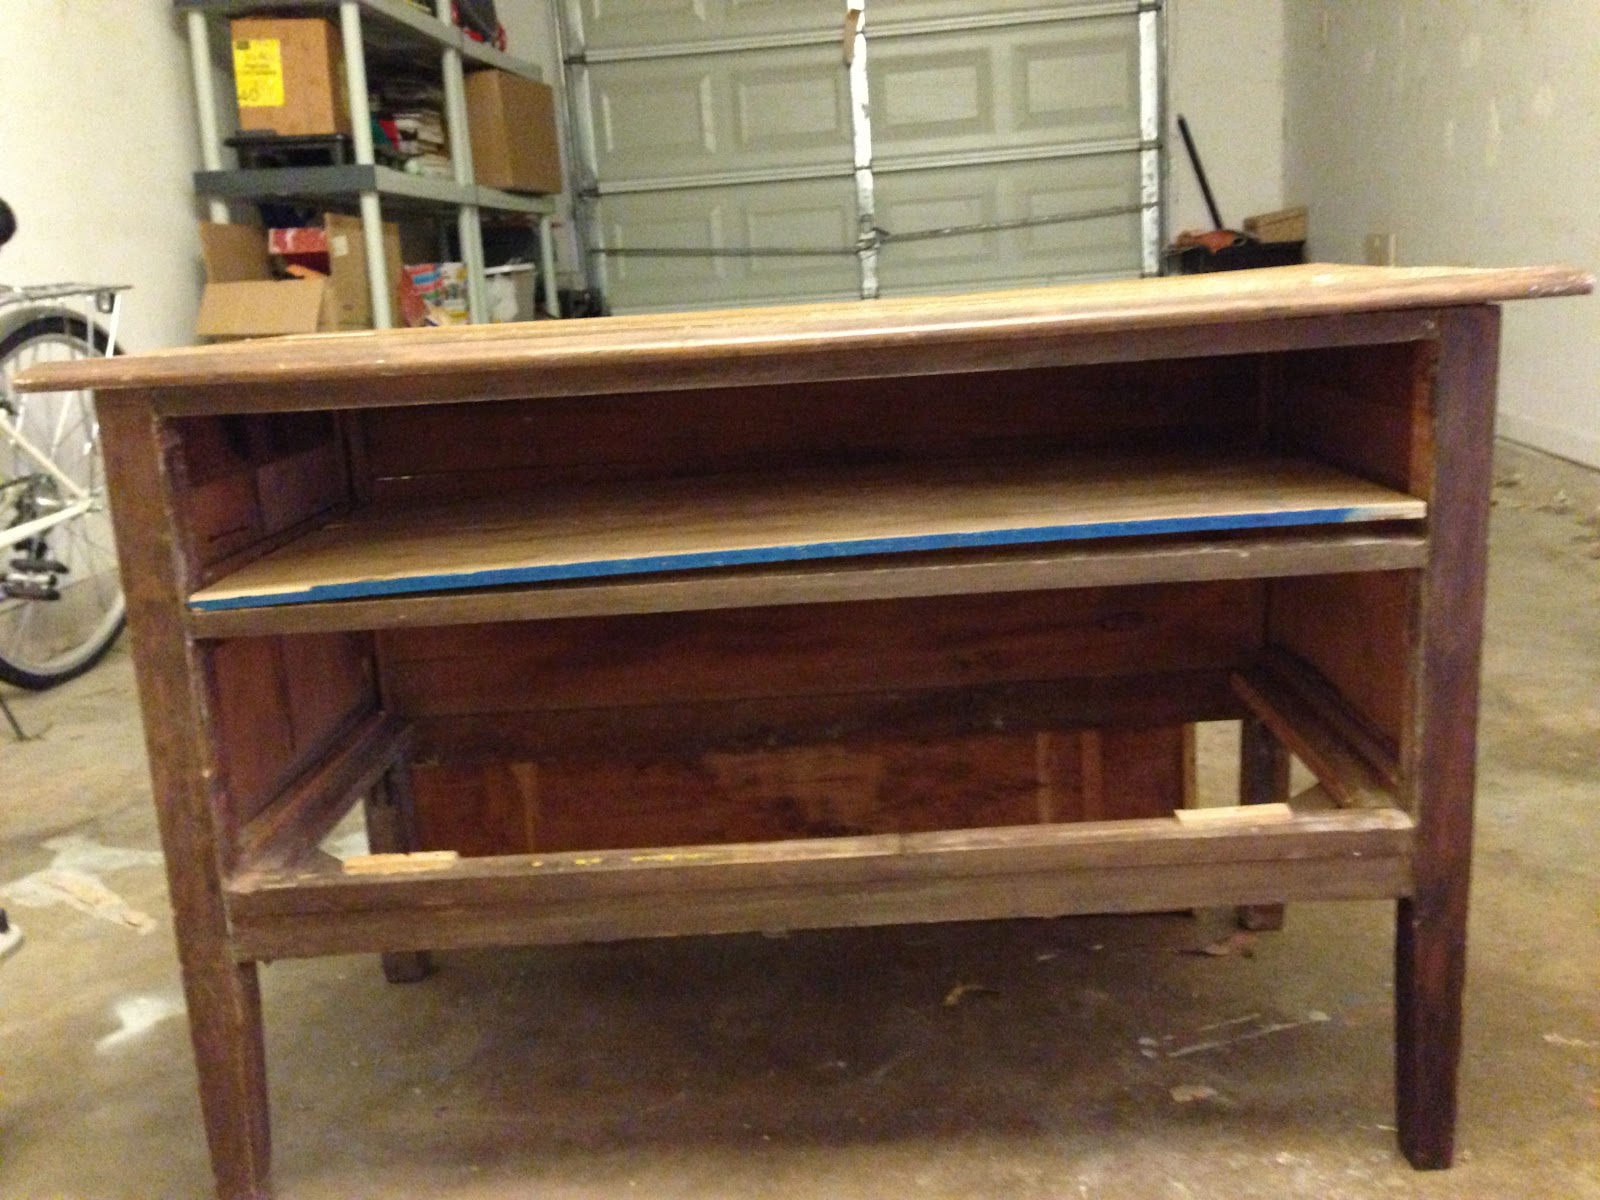
Then I got to sand it down with my brand new Ryobi sander. I like Ryobi tools because they're generally light weight and easy to handle, and I have small girly hands, even when they're covered in paint and sawdust. And no, Ryobi didn't pay me to say so.
 |
| Anyone notice how much I use blue? |
Then, I commenced to taping over the stiles and the drawer front. The stiles are solid wood, and the drawer front is veneer. But it's pretty veneer, and in good shape, so I decided to keep it. Everything else got a couple of coats of blue, inside and out. This included the plywood that was to become the shelf, and the table top. I wanted to stain the table top, but it had been horribly repaired by someone not quite as handy as me at one point, and really was beyond repair. Next came staining what was left a dark color to match the drawer front. Original drawer pulls got a nice red coat of paint. I didn't prime the drawer pulls first, and only used one coat of paint, which gave the effect of almost a red glaze. You can see the wood grain through the paint, which I particularly like. Next I had to drill a large hole in the back of the dresser for the cords to come through. I put everything back together, glueing the shelf in place, and polyurethaned the whole shebang. Ta-da! Finished product.


And actually, I found a dresser that fits the space even better at my grandmother's house, which is getting the TV console treatment soon, so this beauty is available for sale at my etsy store.
Tuesday, February 5, 2013
Let There Be Light!
My garage is not a pretty place. There are all kinds of paint splashes on the floor, and tools hung on the wall. The drywall needs patching, and one wall isn't even taped and bedded - yet. But my friends, I have a dream, that one day, my garage shall be judged not by the projects that have been created there, but by it's own merit. That's right, someday soon, my garage will be not only functional, but beautiful. And insulated.
It being January, when I was painting my brand spanking new kitchen cart, I was doing it in the comfort of my garage. By comfort I mean it was about ten degrees warmer than it was outdoors, and I was at least dry and out of the wind. But that was nothing compared to my lack of lighting. My garage was lit with one bare bulb in a ceramic socket. What's more the light fixture is very near the door into the house, so one whole half of my garage was shadowy. This does not make for good working conditions when you're painting. So I ended up hitting my garage door opener button every 3 minutes to get the light to come back on. You can imagine this caused some frustration on my part. I vowed to replace my single bulb with something more... Well, more. And so the journey to Bart's Barn began.
When I was a pre-teen, my mother relented and let me have a two piece bathing suit. When we went shopping for one, I had an image in my head of the perfect black bikini, and I was on a mission to find it. After an exhausting afternoon and a dozen stores, we did find a bikini for me. It was not black. I was sorely disappointed, and never noticed how awesome I looked in my new suit. From then on, whenever I've headed to a store with something I want already pictured in my mind, I've said I'm looking for the black bikini. This does not work at Bart's Barn. I had in my head a god-awful brass chandelier. Yes. A chandelier. In my garage. No I'm not crazy, I'm a genius. Didn't you get that memo? Of course I was going to spray paint it. I had orange in mind, but I might have switched to yellow at the last moment. I was looking for something like this.


Now this may sound a bit like overkill, but I did not want to end up looking like Crazy Harry. You know, this guy.

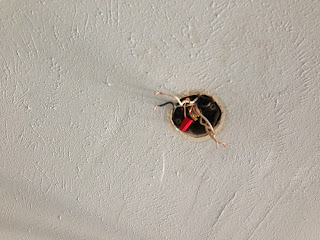
So I unscrewed one from the living room, identical to the one that was holding another hanging light. Logic says if it supports the weight of the hanging light in the living room, it can support the chandelier, right? Well, it hasn't fallen yet. Now I had a problem. There wasn't a joist located in the ceiling anywhere near where I wanted to put my light. So I cut a 2x4 to the width of the space between the joists, and nailed it in place up in the attic. And there is no way I'm showing you my attic. You seeing my garage is bad enough. So you'll have to trust this very official drawing I did on the back of an envelope.

Then I did a little power drilling, and hung the chandelier from the hook. Now it was time to wire. The chandelier had two wires coming out of it. My electrical box had two sets of wires in two wire nuts coming out of it. I stripped the wires on the chandelier, twisted one wire from the chandelier to one set of wires in the wire box, and twisted a wire nut over everything. I did the same for the other wire, and screwed the bolt doohickey into the box where the porcelain socked had been. And then the moment of truth. I turned on the breaker. And threw the switch! Behold there was light, and it was good. And then I crammed all the wires back in the electrical box and the light went out. So I got to turn off the power and retwist everything tighter. I did that about three times before I successfully got the chandelier to work when everything was crammed back in the tiny electrical box. After that, I just had to screw the decorative housing over the bolt doohickey, and admire my handiwork.

It being January, when I was painting my brand spanking new kitchen cart, I was doing it in the comfort of my garage. By comfort I mean it was about ten degrees warmer than it was outdoors, and I was at least dry and out of the wind. But that was nothing compared to my lack of lighting. My garage was lit with one bare bulb in a ceramic socket. What's more the light fixture is very near the door into the house, so one whole half of my garage was shadowy. This does not make for good working conditions when you're painting. So I ended up hitting my garage door opener button every 3 minutes to get the light to come back on. You can imagine this caused some frustration on my part. I vowed to replace my single bulb with something more... Well, more. And so the journey to Bart's Barn began.
When I was a pre-teen, my mother relented and let me have a two piece bathing suit. When we went shopping for one, I had an image in my head of the perfect black bikini, and I was on a mission to find it. After an exhausting afternoon and a dozen stores, we did find a bikini for me. It was not black. I was sorely disappointed, and never noticed how awesome I looked in my new suit. From then on, whenever I've headed to a store with something I want already pictured in my mind, I've said I'm looking for the black bikini. This does not work at Bart's Barn. I had in my head a god-awful brass chandelier. Yes. A chandelier. In my garage. No I'm not crazy, I'm a genius. Didn't you get that memo? Of course I was going to spray paint it. I had orange in mind, but I might have switched to yellow at the last moment. I was looking for something like this.
I did not find something like that. Instead I fell in love with something else. And I couldn't bear to paint it, not even orange. Meet my new chandelier.

Ok, I am going to tell you how I went about installing this beauty. If I inspire you to buy your own chandelier for your garage, and install it, and you somehow get your fool self electrocuted, I am not liable. So don't come suing me. I'm broke anyhow.
First, I opened the garage door, to get some light in there. Then I turned on my bare bulb. I had a buddy switch off circuit breakers one by one until the light went out. I took the further precaution of then switching off the bare bulb. I unscrewed the light bulb, and the porcelain socket, and gently pulled it away from the ceiling. After removing the wire nuts, I took my volt-o-meter and tested that there was indeed no significant electricity running through the wires.
 |
| I'm here for your protection. |
Now this may sound a bit like overkill, but I did not want to end up looking like Crazy Harry. You know, this guy.

When I had done all that, I decided it was safe to untwist the wires of the porcelain socket and remove it. Now I had a big gaping hole in my ceiling.

I was careful to remember which wires had been twisted together, and which hadn't. Now it was time to get my swag on. I wanted to swag my chandelier so that instead of being right in front of the door, the light would be more centered. Which means that I needed a hook, and a joist. I have no shortage of hooks. I don't know what was up with the previous owner of my home, but they had hooks all over the place in the ceiling. Seriously, there are 3 in the ceiling of my powder room alone.
 |
| I really hope these were for hanging plants. |
So I unscrewed one from the living room, identical to the one that was holding another hanging light. Logic says if it supports the weight of the hanging light in the living room, it can support the chandelier, right? Well, it hasn't fallen yet. Now I had a problem. There wasn't a joist located in the ceiling anywhere near where I wanted to put my light. So I cut a 2x4 to the width of the space between the joists, and nailed it in place up in the attic. And there is no way I'm showing you my attic. You seeing my garage is bad enough. So you'll have to trust this very official drawing I did on the back of an envelope.

Then I did a little power drilling, and hung the chandelier from the hook. Now it was time to wire. The chandelier had two wires coming out of it. My electrical box had two sets of wires in two wire nuts coming out of it. I stripped the wires on the chandelier, twisted one wire from the chandelier to one set of wires in the wire box, and twisted a wire nut over everything. I did the same for the other wire, and screwed the bolt doohickey into the box where the porcelain socked had been. And then the moment of truth. I turned on the breaker. And threw the switch! Behold there was light, and it was good. And then I crammed all the wires back in the electrical box and the light went out. So I got to turn off the power and retwist everything tighter. I did that about three times before I successfully got the chandelier to work when everything was crammed back in the tiny electrical box. After that, I just had to screw the decorative housing over the bolt doohickey, and admire my handiwork.

Sunday, January 20, 2013
Kitchen Cart Intensive Care


It cost me $40. First order of business was that butcher block top. I sanded it down to get out the worst of the knife scars, and applied liberal amounts mineral oil. (This can be found at your local drugstore near the laxatives. Don't ask me why.) After a ten minute wait and a brief wipe down, it sprung back to life in a way I had scarcely hoped for.
 |
| Look at it shine! |
Now this kitchen cart baffled me. It was very sound construction, but the materials were pretty crappy stuff. 3/4 inch plywood and particle board made up most of the structure. The handles for the doors were a nice copper, but you could hardly notice against the rough surface of raw plywood. Some of the cut ends of the plywood hadn't even been sanded. So, I decided to paint the whole thing. I started by sanding everything that hadn't been sanded. I mixed some of my blue paint leftover from the pot lid holder with some darker blue to get a denim color. Since I had mixed the paint, I didn't want to run out halfway through the project, as I'd never match the color. Normal people would turn to primer for this much raw wood. I didn't have any primer. What I did have was a hideous gallon of oops paint my mom had bought. It was roughly the shade of my skin, and she swears it looked good in the store. So I slapped a coat of that on everything to soak into all the raw wood and spare me 3-5 coats of blue paint.
 |
| I promise I'm not going to leave it this color. |
 |
| For Science! |

While I was at it, I chopped off the feet of the cabinet, and added a piece of plywood to the base, to screw some industrial type castors onto. The castors that came with the piece were the kind you pop into some kind of hole drilled into the feet of your piece. Basically what this means is any time you lift your cart, your castors come out and roll away. No bueno. My new castors are screwed in tight and aren't going anywhere, plus two of them lock for keeping my cart in place when needs be. I didn't take pictures of the process, but it's really pretty self explanatory. Next I turned my attention to the interior. The shelves got shelf paper. BTW, contact paper doesn't stick too well to particle board. If anyone has any tips on making it stay better, let me know. I put it in place and weighed it down with books overnight. That helped some.
The next little tidbit comes from Pretty Handy Girl. I wanted to not see the support braces in the back of my cabinet, so I made false backs out of fabric and foam board. This is cool for the backs of open cabinets. Step one, measure your cabinet backs carefully. 
Step 2, cut a sheet of foam board to fit the space. I used an exacto knife on my handy butcher block cutting board.

Step 3, cut your fabric 2-3 inches bigger than your foam board. I picked this orangey yellow solid, since my shelf paper is a kind of busy print.

Step 4, use packing tape to stretch the fabric tight and sort of "upholster" the foam board.

Step 5, push the foam board carefully into the space you measured it for. Ta-da!
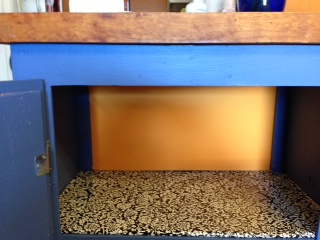
And now for the big reveal! Somehow, magically, my cart came out to be EXACTLY counter height. So cool!
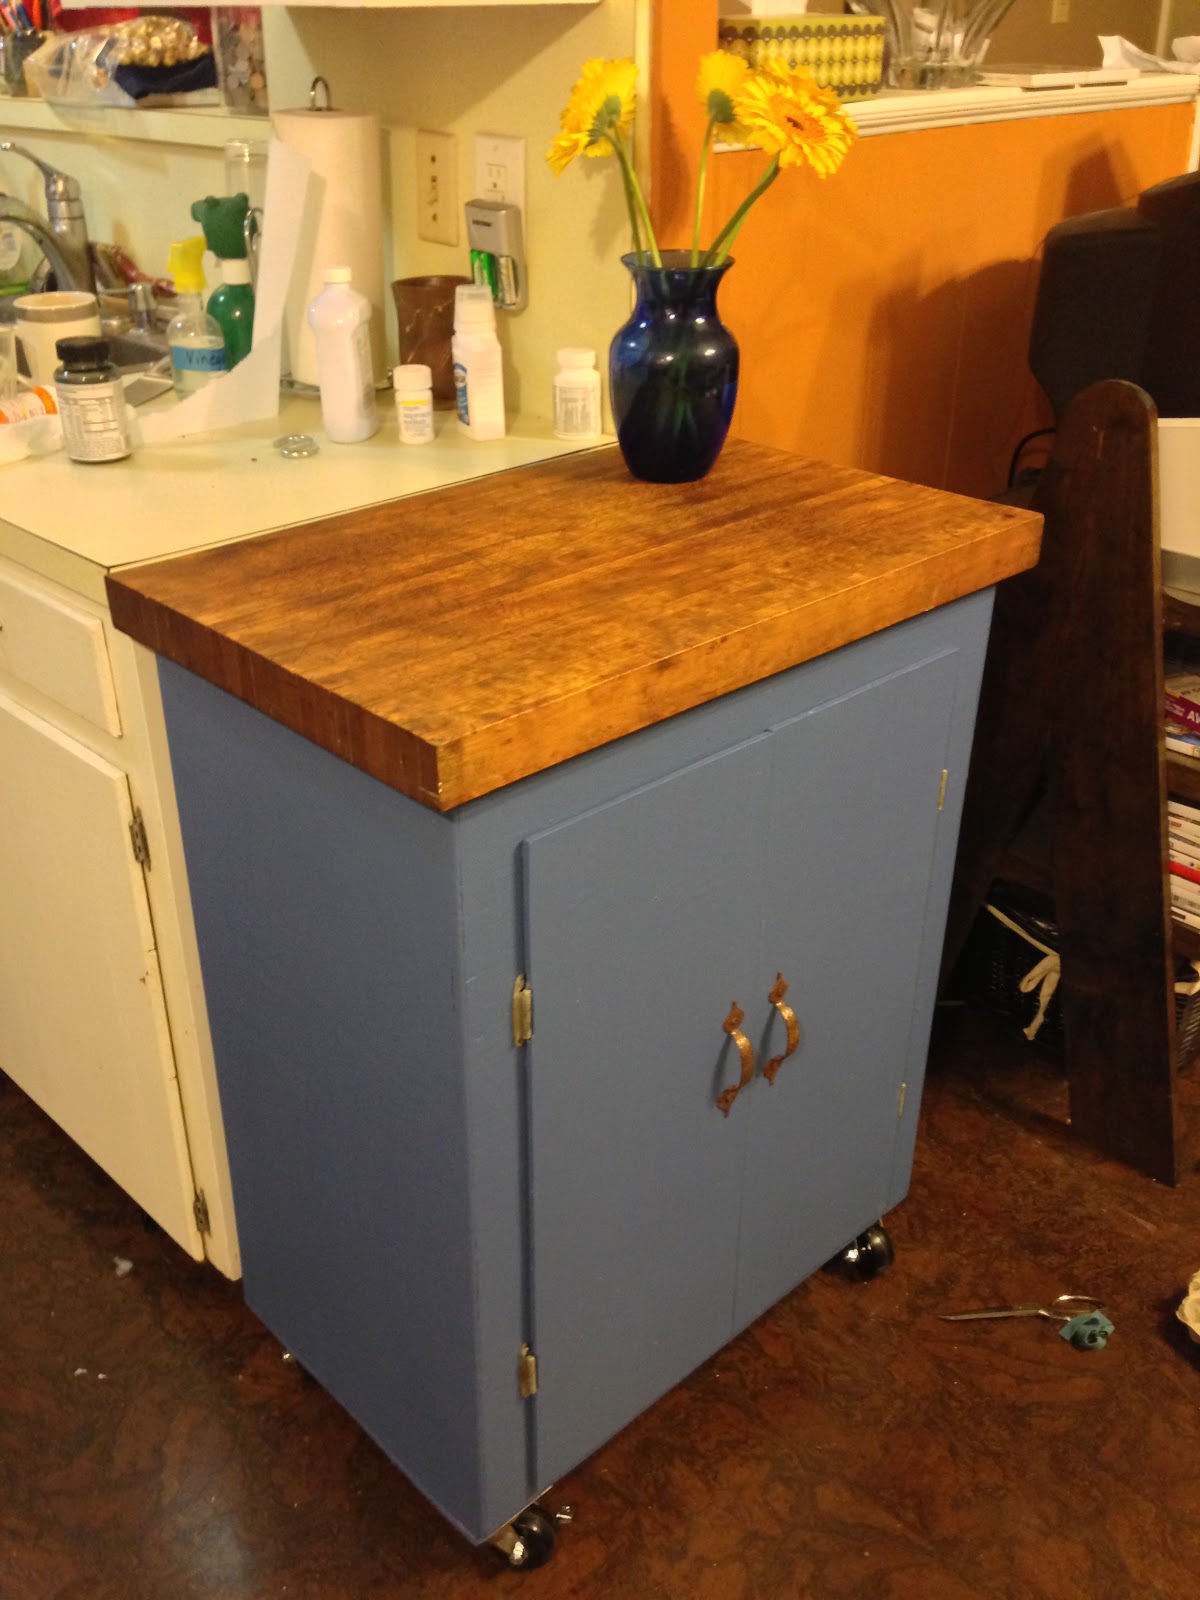
My total cost was just under $100. For a little perspective this similarly sized butcher block cart with open shelves is more than three times that.
Wednesday, January 16, 2013
Kitchen Drawer Shadow Boxes
Handy Mandy! Where have you been? I've missed you so much last August!
I know, my fellow DIY friend, I have been MIA. But you know what happens in August? School. And I am not just a super hero when it comes to slapping a coat of paint on junk and turning it into something totally cool. I am also a super hero who teaches children how to read, write and do 'rithmatic. So I don't have time for a lot of handying around the house in the fall. But I'm back! And I have a tale to tell.
It all started with me getting a circular saw for Christmas. (Thanks Santa!) It's green and beautiful, and I couldn't wait to cut stuff up. So I carried it out to my garage, so it could have a place of honor on my work bench. And this is what I saw.

So I decided to clean up the space a little. First order of business was to hang that mirror that had been waiting patiently since last summer for a place in my back bathroom, and then I thought I'd throw up some shelves for all my paint. So I went to Ace Hardware for some D brackets for the mirror, and while I was out I picked up some remnants from JoAnne's, and then I went to Bart's Barn. Well, you know how it is with me and Bart's Barn. Sure I found parts for my shelves.

I took off the hardware and put it in a ziplock baggie with it's screws so I could find them again.


Aren't they so Martha Stewart? No? Good. This is turning into the bathroom that the kitchen built.
I know, my fellow DIY friend, I have been MIA. But you know what happens in August? School. And I am not just a super hero when it comes to slapping a coat of paint on junk and turning it into something totally cool. I am also a super hero who teaches children how to read, write and do 'rithmatic. So I don't have time for a lot of handying around the house in the fall. But I'm back! And I have a tale to tell.
It all started with me getting a circular saw for Christmas. (Thanks Santa!) It's green and beautiful, and I couldn't wait to cut stuff up. So I carried it out to my garage, so it could have a place of honor on my work bench. And this is what I saw.

So I decided to clean up the space a little. First order of business was to hang that mirror that had been waiting patiently since last summer for a place in my back bathroom, and then I thought I'd throw up some shelves for all my paint. So I went to Ace Hardware for some D brackets for the mirror, and while I was out I picked up some remnants from JoAnne's, and then I went to Bart's Barn. Well, you know how it is with me and Bart's Barn. Sure I found parts for my shelves.
 |
| Total cost $7 |
And sure I hung me some shelves.
But I didn't stop there and you know it. I wandered around looking at what they had. When I got to the cabinet section I noticed that there weren't very many cabinets to be had, but there was a whole mountain of drawers and doors. Someone had probably gotten their cabinets refaced and abandoned all the doors and drawers that were original to the skeleton. They were like pound puppies or orphans or something. I couldn't just leave them there. So I picked out a few and brought them home with me.
 |
| They need me! |
I took off the hardware and put it in a ziplock baggie with it's screws so I could find them again.
And then it was a matter of sanding, painting, drying and reattaching the hardware. And I put some contact paper in the drawer to make it pretty.
Now these aren't going to hold anything particularly heavy, so I threw on some D rings, and strung them together with picture wire.
Oh come on now. You know how to do this part. Hole in the wall, molly bolt in the hole, screw in the molly bolt (not all the way) and hang your new shelves!
Aren't they so Martha Stewart? No? Good. This is turning into the bathroom that the kitchen built.
Subscribe to:
Posts (Atom)